Wednesday, October 27, 2010

A room with a view a.k.a my sewing studio

It is not much, but this is where I spend most of my times these days
Every now and then I will look up to clear skies and white fluffy clouds
The weather is changing and the temperature is dropping fast 
(though sunny, it is 15 degree max today) 
Autumn is here *grin*

While we are in my humble sewing room let me show you another corner...
Now you see it....
Tadaaaa.. the mess is gone *grin*
I love this build in wall cabinet.. 

OK, maybe just one more.. 
The wall of progress
I have completed few more Kinoko Slings
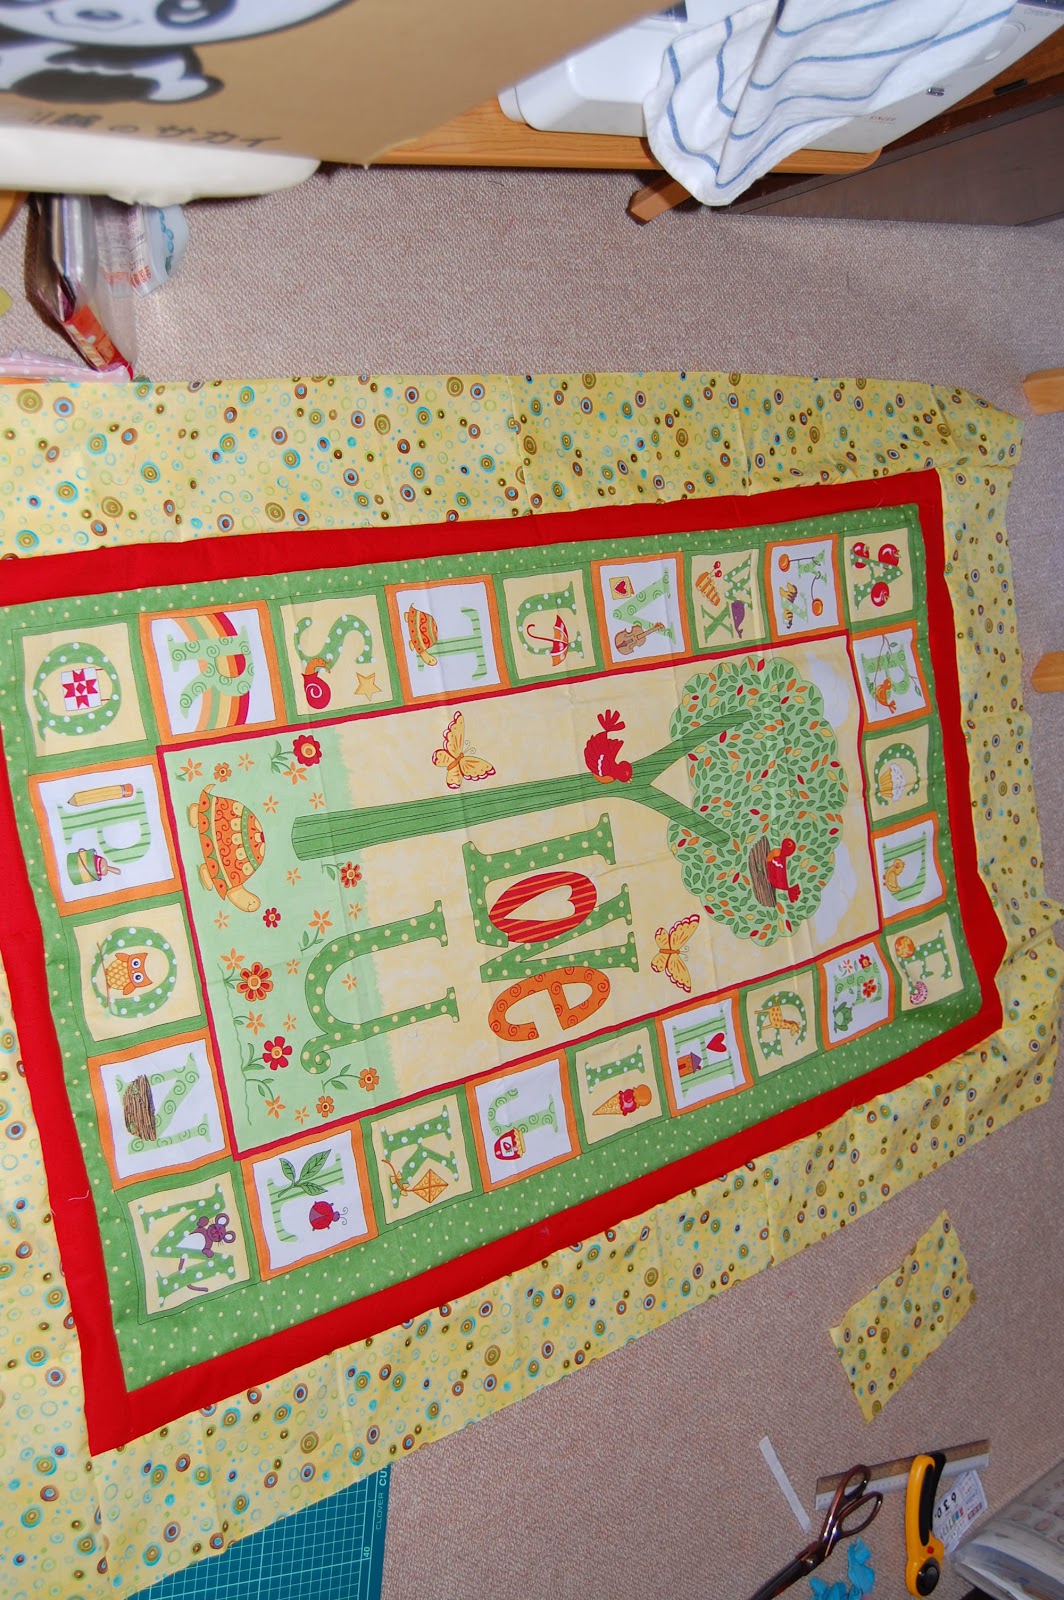
I am working on a wall hanging 
Few blocks of log cabins waiting to be turned into something

There's no picture of the floor mainly because I tidied up the table top and threw everything on the floor for the photo shoot *roll eyes*
It is also full of threads and small fabric pieces.. maybe I should join Tini Hani's Jom Jahit and make a trim catcher for myself and safe me the headache of vacuuming every other day..    

Pin It

Monday, October 25, 2010

Eraser Carving

We didn't have any plans for the weekend. Hubby just got back from a conference, and the weather was not very cheerful. So we decided to stay in. However, with an 8 year old in the house we couldn't just sit and do nothing (which is what hubby and I would have preferred) *sigh*
So, we did some amateur eraser carving.. well Sofea did most of the carving actually, I was just there to make sure she didn't cut herself and fussing over the tremendous amount of mess she was making... *grin* 
I'd have to say, she is quite a determined child, though she made quite a number of mistakes, and at one point was at the verge of tears, she didn't give up. She continued until she was happy with the result of her work
Her completed pieces included buta-face (piggy face) and two hearts. They turned out quite nice for her first attempt. 

It is an interesting activity you can do with your older kids. All you need are:
1. A block of eraser (special for carving projects) (1st pic)
2. Carving tool (3rd pic)
3. Ink (2nd pic)

For professional eraser carving, feel free to visit: 
Pin It

Friday, October 22, 2010

HOUSE Quilt

My House quilt is finally completed after a year *roll eyes*
I started working on it before the ABC quilt and truck quilt. It was supposed to be a practice quilt, where I test the different technique i.e. applique, free motion quilting, patchwork, basting and binding.  
However, since then, I have completed 2 big quilts and various baby quilts and wall hangings and yet the practice quilt sat there in the corner of my sewing room unfinished.. haunting me *sigh*
About a month ago, I kind of lost my MOJO.. I tossed and turned and ended up rearranging my sewing studio. I unearthed the unfinished house quilt and immediately started working on it.

The house quilt consists of 6 applique blocks each containing a house. I used fabric remnants and didn't really think about coordination and match for the quilt as a whole (I made the top a year ago, when I first started sewing seriously and didn't know about KOKKA or LECEIN) 
I didn't use batting for this quilt, but instead backed it with a towel type material (I don't know the proper term for this type of fabric). It is very warm and heavy thus making quilting difficult. I have muscled arms after I finished quilting this piece *grin*
The binding is simple and straightforward. I used green plaid fabric in my stash with one part of polka dotted fabric for the binding. 

Any UFOs in your closet..??? 


Pin It

Tuesday, October 19, 2010

Refashion Tuesday

After the success of lengthening Sofea's jeans (here), I decided to try to refashion a top for her. I've kept all of her shirts since we came to Japan (which is not a good idea as Japanese houses don't hide clutters well..) 

Sofea in her 'new' top and miss piggy face.
p/s - she specifically instructed me not to include her face in the pic..
but well what are mothers for, if not to embarrass you in public.. *grin* 
First you'll need to identify the problematic areas. For this project, I needed to add length to the shirt and expand the sides. I've used 3 old shirts to create this new look.. 

Here is the How to
1. Use the seam ripper, or small thread scissors to rip open the seams (on the sides, the hem at the bottom and sleeves)

2. I used strips from a second shirt (yellow to match the middle yellow part on the main shirt) to add length to the main shirt. Sew with right sides facing. 

3. As Sofea is a big fan of ruffles, I decided to add few layers of ruffles on the front of the shirt.
4. Cut strips - about 4-5cm in width, length - maybe double the length of the shirt depending on how much ruffles you want.

5. I used my rolled hem foot to hem one part of the ruffles (you don't have to if you are using knit fabric, but I love the effect the rolled hem creates - adds to the ruffles)

6. Straight stitch the top of the ruffles, remember not to back stitch.
7. Pull the thread and adjust the ruffles

8. Sew the ruffles onto the fabric, making adjustment where needed

9. I used strips taken from a third t-shirt (white in colour) to add to the sides of the main shirt.
10. Measure the width you need and sew with right sides facing 

11. I originally wanted to add long sleeves to this shirt, but decided against it and just hemmed the sleeves. 
*I would hem the sleeves with matching bias tape next time - It gives a more professional finish to the whole shirt*

. And you are done.. put it on the child and ask them to prance around.. Though she is making faces, Sofea really loves the 'new' look, better than the original version *grin* 

How's your day looking..??Pin It

Monday, October 18, 2010

Fabric Find - Flower Sugar

It is getting colder outside, I have my sweater on, not to mention sore throat and coughing.. I almost forget it was blazing hot just a mere month ago... 

The only thing besides warm lemon tea that can sooth this pain is beautiful fabric *grin*

How can you not love Flower Sugar by LECIEN??? 
It comes in 3 colourways. 
What would you make out of these lovelies..??


Which is your favourite..? 
Have a GREAT Monday.. you might not be able to tell, but I'm actually being sarcastic here.. hehehe 

Pin It

Wednesday, October 13, 2010

Adding length to kids' jeans - How to

Signs of autumn is visible around us, leaves changing colours, air cooler and daytime shorter. Change of season means change of wardrobe. It's time to bring out the winter clothings - long sleeves, long pants, coats and sweaters. However, it is also kind of a stressful time for me, mainly because many of Sofea's clothes seemed to have shrunk this time around..

However, instead of chucking them all out and buying new clothes, I've decided to refashion them, as most of them are still in very good condition. As my first project, I've added length to Sofea's old jeans (few summers ago, I added ruffles to Sofea's jeans here).

Here's how I do it
I'm using the black jeans as my guide for the length I aim to achieve

Measure the length you'll need to add, 
don't forget to add seam allowance

Cut the legs of the jeans below the knee

1 FE is enough (with some extra) for a pair of jeans
Cut the width you require

Sew a loop, it has to be the same size as the opening of the jeans

With right side facing, pin the fabric loop to the jeans

Sew all around
(To avoid fray, use a zigzag or other similar stitch) 

Open, repeat with the other leg
Now, we are going to attach the lower part of the jeans to the fabric

With the right side facing, pin the lower part of the jeans (the cut part) to the fabric

Sew all around and repeat with the the other leg

As you can see, the blue jeans on the left is now about the same length as the black jeans
I've also used the balance fabric from the FE and applique in onto the jeans 

I've used some Kitty fabric remnants for the other blue jeans

Hopefully the jeans would last her another year.. *grin* 

Any refashion ideas you'd like to share..?? 


Pin It

Tuesday, October 12, 2010

Our 3 day weekend

We had a 3 day weekend (Monday was a public holiday here in Japan) and a nice sunny spell.. So we went grape picking.. The grape vineyard is located in Osaka, we headed there with other Malaysian friends (about 30 people).
Climbing to the grape vineyard
All you can eat Japanese grapes, pick-wash-eat-no time limit (Adult RM37)
Fresh grapes straight from the tree
With some of the girls

Sofea
Us
I also managed to get started with my quilting projects...


Hope you had a wonderful weekend as well.. 

Pin It

Tuesday, October 5, 2010

Handkerchief with gauze backing - How To

Handkerchief..
Do you have one in your pocket? or in your handbag?
Do you lay out handkerchief for your husband or with your children's school uniform?
In Japan, everyone carries at least one if not more, it is part of their culture.
I LOVE handkerchief!!! My handkerchief drawer is as big as my undies drawers *grin* Thought I'd share a simple how to - making your own handkerchief with a gauze backing

You'll need:
Gauze fabrics - I have a lot of fabric baby nappies (rescued from somewhere)
Fabric for the top (FE size would suffice)
Sample hanky (to measure for size)
1. Use the sample hanky to cut your gauze fabric
(I am using 2 pieces of gauze fabric for extra absorption)
2. Repeat the same process as number 1 with the top fabric
(cut 1)
3. Line the main and gauze fabrics with the right side facing and secure with pins
(don't worry if the sides don't meet)
4. Sew all around leaving space for turning
5. Cut excess fabric and snip corners
6. Turn, press and edge-stitch all around
And you are done..

For more refashion ideas:
How's your week looking so far..??
Mine is bleak and painful... I'm down with flu.. *cough-cough*


Pin It

LinkWithin

Related Posts with Thumbnails