Saturday, February 27, 2010

This is how I do it - Travel sewing case

This is how I made my travel sewing case (blogged here).

First - Preparing the top
First I chose among my fabric scraps a stack of similar sized squares (scraps from making bags' corners)

Rearrange the squares until you are happy with the combination

Patch the squares to form strips, cut excess

Iron the seam open

You will now have a decent looking top

I used my recycled batting from here for the back

Quilt the top with the batting. I used walking foot (use the darning foot for free-motion quilting). Do not worry about producing perfect quilting. The end result is usually satisfactory.  Using lighter coloured threads when quilting produces similar results once completed but 'hides' any quilting errors you might make.  

Quilted top
Next - Inside piece
First decide how and what to include -
Since this is a travel sewing case, these are the features I want:
1. I want some extra pockets to carry different items i.e ribbons, laces, sticky notes, pens and seam ripper
2. I want to carry my threads in style - easily accessible and does not get tangled
3. I also need a small picushion and needle holder

Once you've measured and cut your pieces, arrange them on the base piece. Sew the pockets, pincusion, felt needle holder and button.

I attached a small elastic band on the inside of the main pocket to create gather

Sew around the top piece and inside piece with back facing. Trim excess and clip corners 

 Attach loops or elastic band for closure before binding the case using lace or bias tape.  
Pin It

Friday, February 26, 2010

Jom Jahit - Sew Along

It had been quite a while since I had last sewn anything for myself.. I am almost always rushing to finish a commision.. But today, I had the most 'fun' day, creating and designing and making something for me.. This is what I made, a travel sewing case using scrap fabrics *happy*

I was thrilled to find TiniHani's sew-along here. I've always wanted to make a 'roll' for my sewing stuff especially to be used when we travel. I got my inspiration out of a Japanese craft book and adjusted to meet my needs. My travel sewing case has 3 pockets, thread holding line, pincushion and felt needle holder.

Next , This is how I do it - Travel sew case 

Pin It

Thursday, February 25, 2010

Batting scrap busting

If you use quilt batting in your crafting, after a while, you'll end up with batting scraps like this..
What do you do with your odd sized batting scraps??

I separate them into piles..
Very small pieces like this goes into 'stuffing pile,'
to be used as stuffing in pincushion or soft toys.

Small and medium pieces are pieced together (using zig zag stitch)
to be used in small projects like making card holders.

Bigger pieces are also stiched together (using zig zag stitch)
to be used in my bag projects like quilted bento.   
How do you manage your batting scraps?? Care to share..
Pin It

Tuesday, February 23, 2010

Sayonara Alphabet Quilt

The alpahabet quilt is DONE!!!!
I am very relieved and happy.
At the same time I'm rather SAD....
Because it means soon enough I'll have to part with it,
As it's going to Australia.. :(

Sofea 'helping' me during the photoshoot..

I used tutorials provided here to help me with the alphabet quilt. I would first choose a pattern, watch the video provided in the tutorial, then draw the pattern on a piece of paper before attempting it on the quilt. It was quite tough and I had stiff neck from all those long hours of sitting in one position, but in the end I think it was all worth it and I definitely am more confident to use free motion quilting in the future.    

Since I had 26 alphabet blocks plus 4 corner blocks to quilt, I was able to use different filler designs for the quilting. This allowed me to practice different designs and I find curves and circles easier to manage than squares and triangles when using free motion quilting. It also helps if you are not bare-handed when quilting, using gloves helps a lot - though leading to excessive sweating *sigh*

I am infatuated by the texture the quilting creates on the back of the quilt. I also love how the rainbow colours of the binding stands out to the contrasting white.  
What do you think of the Alphabet Quilt??

Pin It

Sunday, February 21, 2010

This is how I do it - Attaching zipper

For a long time, attaching zippers were daunting to me. 
When I first started sewing, I avoided any projects involving zippers until it was
no longer possible to avoid learning how to do it anymore.
I found some helpful tutorials on how to here, here and here.   

 
I thought I'd show you how I do it.
This may not be right, or may not be how you'd do it,
but it works for me, so I thought I'd share..

 I like to buy long zippers in many colours  


 I usually get the 110cm length which comes with 4 zip fasteners.

First, pull all the 4 fasteners out and open the zip. 

Next, attach the zipper foot and use only one strip of zipper,
sew around the bag openning with the needle on the right.

Sew the zip all around the bag openning, stop just before you reach
the starting point. Leave about 1-2cm gap. 

Adjust the zipper foot so the needle is now on the left,
sew around the bag openning again.

Not only have you managed to attach the zipper but you've also
topstitched and created a professional look to your bag.

This is how the zip looks on the inside before you attach the fastener.

Attaching the zip fastener: allign the handles together and insert the fastener.
*it might be a bit tricky the first time*

Cut the access zip and push it inwards.


Tadaaaaa... you are done!!
you can sit back and admire you finished work.


I think this tutorial is..
Pin It

Friday, February 19, 2010

Friday Fabric Find

Another design from Robert Kaufman's Forest Fun collection (owl).

This is Spring by Amy Schimler from Forest Fun
Contents: 100% Kona® Cotton
Width: 44'' wide
Weight: 4.3 oz. per square yard.


I ADORE the colour turquoise.
But I hardly have anything in that shade.
How about you? Do you see any turquoise around you?  


Pin It

Thursday, February 18, 2010

Around my sewing studio - Part II: NOTION

You have seen how I try to set some kind of working system in organising my fabric in my tiny sewing studio in the last post, today I'd like to show you how I deal with notions. These things are harder to handle as they come in various sizes and types.

Ribons, laces, homemade bias tapes in basket (tute here)

Pins, zipper pullers, fabric markers, cutter, bias tape maker, lighter??
in a small case bought from 100 yen shop

Threads and bobbins in Ikea cases

Velcro, elactic bands in popcorn box
magnetic snap buttons, prongs, flex frames, handles,
etc (I dont even know what's in there) in fabric box (tute from Sew,Mama,Sew)

Buttons in milk bottle and machine needles in felt box (tute here)

Handmade labels in cookie tin from Disneyland
Laces in cookie tin from Hokkaido

EMS forms, address book, tapes, strings, thank you cards on wall hanging

So, how do you manage your sewing supplies?


Pin It

Tuesday, February 16, 2010

Around my sewing studio - Part I: FABRIC

Being in Japan doesn't allow for the luxury of SPACE. Yet I am lucky to have a room all to myself. 
My sewing studio is very SMALL, thus the need to organise it in such a way that everything is easily accessible and in view, but still have some room to move without knocking stuff down.   

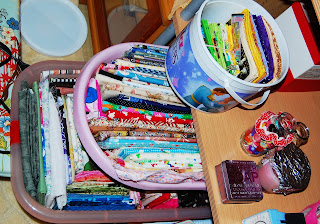
Linen blend cotton, polka dot, stripes and small cut fabrics are on the open shelf 

Fat Quarters and smaller cut fabrics are in baskets 

More than 1m fabrics are stored in 3 tiered shelf

Scraps and remnants are stored accoding to colours in plastic bags and put in a box
How do you organise your sewing studio? I try to spend 15mins once or twice a week to organise stuff in my sewing studio. How about you? 

Next, Around my sewing studio - Part II: NOTION
Pin It

Monday, February 15, 2010

Weekend wonkiness

I was inspired by this week's Sew It sew-along to make a wonky patchwork pillowcase for my girl. 
It was an easy and superfast project (if you already have all the pieces lying around).
I had some scraps left from this project.
Quickly and wonkily combine everything together.
  

I used gauze fabric scraps leftovers from quilting projects for the pillow front and back.
I had to patch the fabrics as I did not have one big piece.
Then machine applique the combined pieces on the fabric.
I also quilted the center piece (just because I had nothing better to do and the sun was shining).  


Instead of making proper fabric ties, I simply used some heart ribbons from my stash.


Completed wonkiness sunbatthing in rare sunlight *Grin*

How was your weekend?Pin It

LinkWithin

Related Posts with Thumbnails